Showing posts with label Health & Fitness. Show all posts

Saturday, June 29, 2019

A Soup Diet Can Jump-Start Your Weight Loss — If You Do It Right

There’s a science-backed, all-you-care-to-eat diet that helps some folks lose nine pounds in a single week — and that’s not even the best part. We’ve convinced one of the world’s most respected nutrition experts to turn the approach, which is built around unprocessed plant foods, into what may be the easiest and most effective soup diet ever.


“You can make a big batch of my soup and have enough delicious heat-and-eat meals to last for weeks, and I think you’ll be surprised by how satisfying the soup is,” says Michael Greger, MD, author of the runaway bestseller How Not to Die: Discover the Foods Scientifically Proven to Prevent and Reverse Disease. “It’s a perfect strategy for beginners, anyone who struggles with portion control, or anyone who’s just really busy. My hope is that this soup jump-start will help you lose so much weight and feel so much better that you’ll be permanently hooked on a way of eating proven to help you live the longest and healthiest life possible.”

How well will Dr. Greger’s soup diet work for you? Scroll below to find out.

Soup Diet: Quick-Start Guide

What you eat: Savor hearty bowls of Dr. Greger’s Vegetable Bean Soup up to twice a day. The rest of the time, enjoy all the oil-free, unprocessed plant foods that you want. Why no animal products? We tend to eat them to unhealthy excess, crowding out more beneficial plant options. And why no oil? It’s the most calorie-dense and least nutrient-dense part of a plant, easily turning meals into calorie bombs.

“You’ll get all the fat you need from whole plants like nuts and avocado with no need to worry about portion control,” Greger says.

Why it works: When readers tested this soup diet for us, the average woman lost nine pounds a week, with our biggest loser dropping 16. That’s roughly double the amount reported when we tested the old Cabbage Soup Diet! Greger says credit goes to the soup itself and what’s inside (and not inside) his soup. For starters, studies show that we burn a lot more calories breaking down unprocessed food — about 65 extra calories for a main course alone. On top of that, eating only plant foods loads us with enough nutrients to spike metabolism even as we sleep. Research suggests plant-based dieters have an 11 percent higher resting metabolic rate. There’s more: All the fiber in unprocessed plant food kills hunger and is proven to rev the growth of “skinny bacteria” in our digestive tracts, a factor linked to effortless weight control and diet longevity.

Now let’s talk soup. Lab tests demonstrate that its unique mix of solids suspended in liquid sends stop-eating signals to our brains faster than any other food. The effect is dramatic enough that in a Penn State study, dieters incorporating soup into their diets twice daily lost 50 percent more weight than those who didn’t. So when you combine soup and plant-based eating, you’re taking an approach that’s already mega-effective and making it work dramatically better.

Soup Diet Success Story

Heather Goodwin, 48, started her first weight-loss program at age 11 but never hit a healthy weight until she went on a plant-based diet and made soup a go-to meal. “In the past, I was always fighting my appetite. With soup and plant-based eating, I could have so much delicious food while still losing weight,” says the Oregon mom, who shed up to 16 pounds a week and an astonishing 304 pounds in all. “I cured my asthma, sleep apnea, diabetes, migraines, high cholesterol, and excruciating joint pain. I’ve been told I look 10 years younger. I feel like a new woman!” Woman’s World reader Charlotte Chase is also impressed. “I wasn’t sure about this diet because I’m not a big vegetable eater,” admits the West Virginia mom, 58. “But I liked the soup so much — and it was so easy to prepare. Plus, I lost 14.5 pounds in one week — with no hunger, no cravings, and so much energy. I encourage everyone to try this diet.”

Weight-Loss Soup Recipe:

Dr. Greger’s Champion Vegetable Bean Soup is hearty, comforting, and bursting with flavor.

2 red onions, chopped
1 cup minced celery
6-8 cups salt-free vegetable broth
4-6 cups chopped mushrooms
2 red bell peppers, seeded and chopped
1-2 small hot chili peppers, seeded and finely minced (optional)
2 zucchinis, chopped
4 garlic cloves, minced
6 Tbsp. jarred tomato paste
4 Tbsp. chili powder, to taste (optional)
1/2 tsp. ground turmeric or 1 1/2-inch piece fresh turmeric, grated
2 (14.5 oz.) cans salt-free diced tomatoes, undrained
2 (15.5 oz.) cans pinto beans, drained and rinsed
2 cups corn kernels
4-6 tsp. your favorite spice blend
1 tsp. smoked paprika

In a large pot over medium heat, cook onion and celery in 4 cups of broth until soft for five minutes. Add mushrooms, bell peppers, chilis, zucchini, and garlic until soft, stirring occasionally for 10 minutes. Stir in tomato paste, chili powder, and turmeric until well incorporated. Stir in tomatoes, beans, and remaining broth. Simmer, stirring occasionally, for about 45 minutes. Add extra broth if the soup gets thicker than you like. Stir in the corn, spice blend, and paprika. Serve hot. The recipe makes eight 2 1/2-cup servings.

Fast Soup Diet:

While using this special soup-based jump-start plan, you’re encouraged to eat soup as a main meal up to twice daily. Keep in mind that all oil-free and unprocessed plant foods are unlimited — so you can eat your fill of soup as well as any breakfasts, sides, and snacks you want. While using this plan, be sure to drink plenty of water. Coffee and tea are also encouraged. For best weight-loss results, go easy on calorie-dense options such as dried fruit, nuts, seeds, and avocado. Freely add unprocessed plant-based extras (spices, vinegar, grainy mustard, stevia). As always, get a doctor’s OK before trying any new plan.

Breakfast

Choose one daily; if desired, add coffee/tea with optional stevia and/or plant-based milk.

Option 1: Dr. Greger’s Breakfast Bowl: Top any hot or cold 100 percent whole-grain cereal (such as steel-cut oatmeal or shredded wheat) with assorted fruit, a spoonful ground flaxseed, a spoonful any other nuts/seeds, optional plant-based toppings (such as cinnamon, unsweetened cocoa powder, or dried fruit), and unsweetened plant-based milk.

Option 2: 100 percent whole-grain English muffin, a little nut or seed butter, sprinkle ground flaxseed. Large bowl of sliced fruit.

Lunch and Dinner

Choose one option at each sitting, aiming to choose soup 1-2 times daily; if desired, enjoy sliced fruit for dessert.

Option 1: Dr. Greger’s Champion Vegetable Bean Soup recipe (recipe above).

Option 2: Dr. Greger’s DIY Salad Bar: Top a big bowl of greens with any veggies and/or fruit you like (including pickles and oil-free artichoke hearts); add any beans, peas, or cooked whole grains you like (such as quinoa or brown rice); top with a spoonful of nuts, seeds, sliced olives, or dried fruit and an oil-free plant-based dressing (Easy Vinaigrette: Whisk together 1/4 cup balsamic vinegar, 1 1/2 Tbsp. Dijon mustard, 1/4 cup water, 1 1/2 Tbsp. nutritional yeast, 1 tsp. spice blend, and salt and pepper to taste. Makes 5-6 servings. Keeps in the fridge up to five days).

Option 3: Endless Possibilities Wrap: Spread a whole-grain tortilla with oil-free hummus, guacamole, black bean dip, or vegan cream cheese; add unlimited raw and cooked veggies and beans; season to taste.

Snacks

Option 1: Popcorn made without oil (such as Black Jewel brand)

Option 2: Cauliflower or broccoli, oil-free dip or dressing (such as oil-free hummus, salsa or Health Starts Here dressing)

Option 3: 1 apple or banana with a little nut butter

Make Your Own Menus

Oil-free, unprocessed plant foods are unlimited. To maximize health, Dr. Greger suggests each day you aim for 3 servings each of beans and 100 percent whole grains; 1 serving of berries; 3 servings of other fruit; 1 serving of cruciferous vegetables, 2 servings of leafy greens and 2 additional servings of veggies; 1 serving each of flaxseeds and nuts; 1 tsp. turmeric and lots of other herbs and spices; and five cups of green or hibiscus tea.
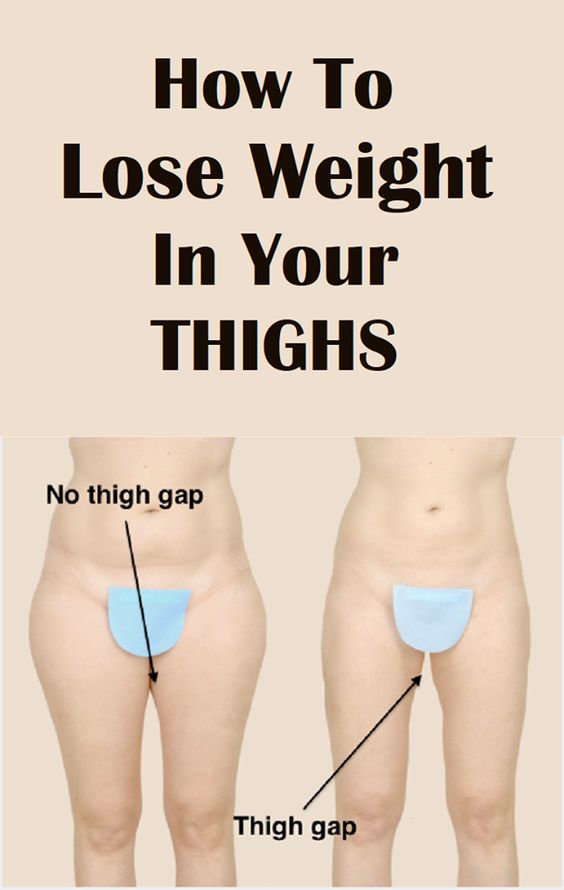
How To Lose Weight In Your Thighs

Ince becoming a personal trainer, the top body part that I often hear complained about by various women are thighs-secondly to abs. Women are always wanting to “slim their thighs” or “get rid of thigh fat.”

Personally, when I was overweight, my thighs are what bothered me the most since my abs never gain any weight hardly. I am the body type that loves to gain weight in my lower half! I am not sure if that makes me lucky or not, to be honest lol.


“So, can you lose thigh fat and make your thighs slimmer?” Simply put, yes, you can. 

“But, I thought spot reduction was just a myth?” It is.

The tactics that require losing thigh fat will require you losing an overall body fat percentage, meaning you will lose weight all over-not just from your thighs. And to lose weight from all over, there are some specific things you must do.

You main focus will be on CARDIO and not much on using any weights. Remember this. I love running intervals on the treadmill or running uphill outside. If you are not sweating, you are not working hard enough. Also, aim for doing HIIT exercises that keep your body guessing so it never gets too “comfortable.”

Try this 20 minute treadmill workout I created next time you are at the gym:

As far as HIIT exercises go, here are a few good options:

High Knees
Burpees
Mountain Climbers
Jump Squats
Lunge Kicks
Jumping Rope
Box Jumping
Butt Kicks

Weights make you muscles grow while cardio leans out your muscles. If you do not care about muscle growth and want to be completely lean, then stop using added weights-bodyweight exercises are totally fine, however!

Secondly, there are a few moves you will want to avoid such as weighted squats and lunges. Why? These grow your legs and glutes. If you want to thin out your thighs, it simply does not make sense to do them. The added weight will create tension on your muscle, thus cause them to work harder the next set which leads to hypertrophy (increased muscle size).

Here are 7 of my favorite thigh slimming moves that you can try at home:

As stated before, using bodyweight is fine! You will want some form of toning or else you will end up with skinny fat legs like I had.

Skinny fat... sounds like an oxymoron, huh? Well, the “skinny” refers to having relatively low levels of lean muscle mass and the “fat” refers to having too much body fat. And when you combine these things–too little muscle and too much fat–you get the “skinny fat” look.

Take my unedited photos below for example. After having my son, it took me a while to get back into the groove of things. My diet was ok and my workouts were not very consistent. Needless to say, but the time my fitness shoot came around, I was anything BUT ready for it physically. After seeing the unedits, I decided to kick my ass into shape and by the next shoot (right photo), I had leaned up and gained muscle-while slimming down. You can see the tone moreso in my legs and that the cellulite and fat had decreased as well.

A third thing you have got to remember when losing thigh fat is DIET. If your diet is not on point, you won’t lose any fat from anywhere. To decrease body fat, I would suggest following a lower carb (notice I did not say “low-carb”) diet, aiming for lean protein at each and every meal. Also, stay away from processed foods-typically SUGAR. SUGAR is the enemy. Increase your water intake to promote fat burning.

Your daily diet should look something like this:

Meal #1

-Banana Nut Oatmeal:

1/2 c. oats
1 c. almond milk
1/2 banana
1/4 c. chopped pecans
dash of cinnamon

Meal #2

-Protein Shake:

2 scoops protein powder
Water
-5 Strawberries

Meal #3

-Grilled Chicken Salad:

1 skinless, boneless chicken breast, grilled
2 cups spinach leaves
unlimited veggie toppings
2 tbsp. lite balsamic vinaigrette
-1 medium sweet potato

Meal #4-2 oz. cheddar cheese-10 multigrain pita chipsMeal #5-2 filet tilapia-1/2 c. brown rice-1 c. steamed green beansMeal #6-1 c. Greek yogurt-10 blueberries-drizzle of honey

Lastly, please know that it takes time. Yes, I know you may hate your thighs and want them gone as soon as possible, but healthy weight loss just does not happen fast. You have to work for it and earn it.

If you are one of the few who cannot get thigh fat to budge, then embrace them and work them!

Know the effects of having too much uric acid in the body

Uric acid is produced in the body. WebMD explains that our bodies create uric acid from the foods we eat and with the natural breakdown of our body’s cells. Most of this uric acid is filtered out by the kidneys and excreted in urine, but sometimes the kidneys are unable to remove it from the blood normally, and this increases the level of uric acid in the blood. 


High levels of uric acid can lead to serious conditions like gout, kidney stones or even kidney failure. Luckily, a simple blood test can determine if your blood uric acid levels are within a normal range. WebMD says you might undergo a uric acid blood test to determine:

– If you have gout
– If your kidney stones are caused by high uric acid levels
– How much uric acid is in your blood, if you are a cancer patient undergoing radiation or chemotherapy, which can cause increased uric acid levels.

Causes of High Uric Acid Levels

The Mayo Clinic explains that high uric acid levels usually happen when your kidneys aren’t working properly to eliminate uric acid efficiently. But there are factors that can cause your kidneys to be overworked:

– Diuretic medications, like water pills  
– High alcohol consumption
– Genetics 
– Hypothyroidism 
– Drugs that suppress the immune system
– Niacin, or vitamin B-3
– Obesity
– Psoriasis
– Purine-rich diet, including liver, game meat, anchovies, sardines, gravy, dried beans and peas and mushrooms
– Renal insufficiency: kidneys can’t filter waste
– Tumor lysis syndrome: a rapid release of cells into the blood caused by some cancers or by chemotherapy for those cancers
– Chemotherapy or radiation

Symptoms

A high uric acid level is not a disease, and for some people it’s a condition that doesn’t need to be treated at all. Sometimes there are no symptoms, but if you have a flare of gout or a certain type of kidney stone, consult your doctor about doing a uric acid test.

Some medications can also increase uric acid levels, so ask your doctor to perform a uric acid test if you’re concerned your medications may be affecting your levels. By no means should you stop taking your medication. If you think it could be increasing your uric acid levels, always consult your doctor before stopping medications.

 Diagnosing High Uric Acid 

A simple blood test can determine whether your blood has an increased uric acid level. If so, WebMD says your doctor will then weigh the results of the test against some of the above causes and your overall health. But WebMD says it’s also important to note:

– High uric acid levels and/or joint pain doesn’t automatically mean you have gout.
– Uric acid can also be measured in urine.
– If your blood results are high, your doctor may also perform a urine test to double-check the results.
– Uric acid levels increase during pregnancy.

Treatment

Some people with high levels of uric acid might need limited treatment. Others, though, such as someone who is suffering from gout, might be prescribed a diet change, according to WebMD. Or as Health Talk explains, there are certain long-term medications for those with frequent flares of gout.

Your doctor will determine whether medication, diet or lifestyle changes are needed to keep your uric acid levels in a healthy range for your body. 

10 Exercises to Obtain a Thigh Gap That Will Only Take 10 Minutes a Day

Many women (and, in all honesty, even some guys) work hard to get the perfect thigh gap. That said, there is no reason to go overboard. Simple things like placing an icepack on the area can help remove fat. There are even a few simple exercises that only take a few minutes a day that you can do to help give you the thigh gap of your dreams.


1. Wide stance squats

This is an exercise that will really help target your thigh area, especially your hamstrings and back legs.

Exercise technique:

  • Stand up, keeping your legs wide apart and your toes pointed out slightly.
  • Move your butt down as if you are trying to sit down.
  • Point your knees out so that they come in line with your feet.
  • The more you point out your toes the more you should feel your thighs.
  • Return to the starting position, doing 30 reps in total.


2. Pilates leg lifts

Not only does this exercise, which has been a pilates staple for decades, help tone your thighs, it can also help your abs and hips.

Exercise technique:

1. First, lie down on your side and fully extend your legs.

2. Lift up your leg slowly and as high as you can. While doing this, try to target your outer thighs.

3. Next, lower your leg back to the starting pose.

4. Just like above, add weights if this becomes too easy.

3. Bridge raises

By lifting up your hips, you can tone your thighs, abs, and hamstrings.

Exercise technique:

1. Lie on your back while keeping your legs bent and your feet hip-width apart.

2. Place an object between your knees, like a towel or pillow.

3. Lift up your hips in order to help your body up from the knees to make a straight line. While doing this, squeeze whatever object you have between your knees as tightly as you can.

4. Lower your hip to the starting pose. Keep in mind not to rest your back until you are finished with the exercise.

4. Butterfly stretches

This exercise might seem simple, but you will surely feel the power in your thighs by the end.

Exercise technique:

  • Sit on the floor and keep your back straight.
  • Place the soles of your feet together and bend your knees, trying to mimic the image of a butterfly.
  • Try to flap your thighs up and down, moving your heels as close to your groin as possible.
  • Continue moving this way ten times.
  • Bend down your head down to your feet.
  • While holding this position, you should feel the stretch in your thighs.


5. Lateral lunges

This is the perfect stretch to tighten your hips as well as make your glutes stronger.

Exercise technique:

1. Stand up straight, keeping your legs apart.

2. Take your right foot and step to the right.

3. Squat as low as possible while trying to straighten out your left leg.

4. Rise up to the starting position and repeat on the left side.

6. Star jumps

Here’s a trick that’s as simple as jumping up and down. It’s kind of like jumping jacks with your legs doing most of the work.

Exercise technique:

  • Stand up with your feet together and your toes pointing forward. Either keep your hands on your hips or your arms out.
  • Keep your chest high, bend both knees and jump straight, extending both legs outward. Your body should resemble a star with your head, legs, and shoulders (or arms) serving as the 5 points.
  • Land with your feet together.
  • Repeat 10 times in a row.


7. Scissor kicks

This exercise can help your abs as well as your thighs.

Exercise technique:

  • Lie on your back and stretch out your legs. The palms of your hands should be kept flat.
  • Lift your legs up off the ground. Lift your left leg higher than your right leg, trying to make a 45-degree angle.
  • Switch the position of your legs, mimicking a pair of scissors cutting. Keeping your toes as pointed as possible will help work your thighs.
  • Repeat 30 times for 2 sets.


8. Cross-stepping

If you’ve ever thought climbing the stairs was work, you are already on the right track; this exercise can be used to help your thighs and even serve as a warm-up for dancing.

Exercise technique:

1. This exercise is best performed on a staircase or some similar base. Hold onto the railing for safety and balance.

2. Cross one leg over the other for the first step.

3. Repeat the previous step with the opposite leg and so on until you reach the top of the stairs. To make it harder, wear ankle weights which will really help to tone your thighs.

9. Stability ball squeeze

This exercise works the thighs directly and requires the use of a Swiss ball or exercise ball. Make sure the ball isn’t too heavy for you before using.

Exercise technique:

1. For beginners, this exercise can be done while sitting down, but some variations have you on your back, though still resembling a sitting position. If you are sitting, keep your heels on the ground while keeping your feet parallel to the floor.

2. Hold your Swiss ball in between your thighs.

3. Try to squeeze your legs together as closely as possible.

4. Hold this position for a few minutes. Repeat.

10. Chair squats

Finally, here’s an exercise that’s as easy as sitting down in a chair! In fact, you can even use a chair or a similar base, although some people can do this by themselves after enough practice which should help stop the temptation to sit down. Either way, this exercise will help your lower body become stronger.

Exercise technique:

1. For beginners, start by standing with your back to a chair, keeping your feet hip-width apart.

2. Keep your weight centered on your heels, drawing in your abs.

3. Hinge forward as you slowly move your bottom to the chair’s seat. Stop right before you actually sit in the chair and return to the starting position.

4. Do 3 sets of this exercise, with 10 to 15 reps. Make sure not to actually sit down until you finish.

Bonus: Make sure not to bulk up your legs.

There’s always too much of a good thing, so some people worry that too much inner thigh work will actually bulk up their legs. Generally, this is easily avoided. Just make sure you are not training for mass and instead perform your exercises in moderation. In addition, don’t significantly increase calories or protein before conducting your exercises.

Tuesday, June 11, 2019

WeightLose Back: Getting Rid of Back Verandah Fat

Back fat is one of the most stubborn

Unfortunately, the back is one of the hardest places in the body to decrease fat and create tone, no matter how strict your diet is or how much you exercise.  The distribution of back fat can be divided into several areas: the upper back above the bra line and the lower back below the bra line.


Fatty areas of the female body such as the flanks (the lower half of the back) are usually thanks to genetics.  We’re born with a certain number of fat cells that are distributed differently from one individual to the next.  That’s why one person may develop fat around their abdomen, another around their thighs and in Jennifer’s case around her back.

Excess fat in these areas can make your clothes fit uncomfortably, cause your bra to dig in and make you appear bigger than you actually are.  When you’re fit and healthy, this additional fat can have a profound effect on your self-esteem and body image.

‘I’ve always been body-conscious and active and a consistent size 12, slim for my 5ft 10in frame,’ Jennifer tells the Daily Mail.  After trying numerous diets, Jennifer decided to take matters into her own hands and like an increasing number of people, choose to investigate liposuction.

The challenge of getting rid of back fat isn’t just down to the fact that you can’t target a specific area of the body through diet and exercise.  The difficulty also lies in the fibrous nature of the fat.  Typically, male back fat is more fibrous than women’s and we often see more fibrous tissue in patients who have experienced dramatic weight fluctuation.  Other anatomic areas which consistently have more fibrous tissue are the male breasts and the fat around the belly button area.

Layers of fat

The fibrous nature of the fat means that it is hard to remove, however, advances in cosmetic surgery has meant treating fibrous areas is now more effective.  This includes smaller cannulas used to penetrate the fat and technology which is designed to break down the fat before removal such as in the case of Vaser Liposuction.

The kinds of back fat

Stubborn back fat can be located from the neck down to the buttocks and also extend under the armpits.  For some individuals the presence of this fat means wearing a bikini, a singlet or a tight fitting shirt is out of the question.

The common kinds of back fat include:

  • Neck – Buffalo humpback fat
  • Shoulder blades/ scapula bone – Infra-scapular back fat
  • Armpit and upper back – Posterior axillary back fat
  • Above/ behind the hips – Posterior waist back fat
  • Above the tailbone – Lumbosacral back fat

Vaser Liposuction to eliminate back fat

‘I was desperate to feel better about myself,’ Jennifer tells the Daily Mail. ‘Then a friend had liposuction on her thighs and said it was the best thing that had ever happened to her self-confidence, so I decided to take the plunge.’ After trying all the fad diets and exercises promising to target her stubborn back fat, Jennifer underwent liposuction to extract more than 1.65 litres of fat from her back and thighs.

Jennifer’s waist before and after liposuction surgery

Liposuction is commonly used to remove fatty lumps or deposits around the back providing patients with a smoother and overall simmer figure.  Vaser Liposuction is one of our preferred methods to get rid of the stubborn back fat as it turns the fibrous tissue into a ‘buttery’ consistency.  It is the high energy from the ultrasound tool that separates the excess fat cells from fibrous tissue transforming it into a butter-like form.

This ultimately allows for easy, gentle suction and provides surgeons with the ability to create the desirable ‘V’ shaped back. The traditional method of liposuction is less refined and instead of softening the fat, it almost shatters the excess fat layer into pieces prior to being suctioned out.  This technique can often leave clumps of unseparated in the targeted areas.

The ultrasound’s high energy is also helpful in promoting skin tightening following the procedure.  In order for the cosmetic surgery treatment to be effective, the skin needs to retract back into place after the fat has been removed. Otherwise, the patient will be left with the undesirable look of skin dimpling and sagging.

Vaser liposuction is effective in eliminating the bulges of fat around the bra line, rolls of fat throughout the back and creating a more proportionate, toned appearance.  The procedure is gentle enough to be performed with local anaesthetic under light sedation which reduces the overall recovery time.

An example of a patient before and after back liposuction

‘The bruising and pain weren’t as bad as I’d expected and my back felt much smoother and leaner when I ran my hands over the compression garment I had to wear for six weeks to aid the process’, says Jennifer. ‘Once the swelling had subsided I was thrilled with the results, more so because I’d dropped a dress size to a ten.’

A non-surgical approach to back fat

For those patients wanting to explore a non-surgical approach to removing their stubborn back fat, CoolSculpting could be the answer.  This non-invasive procedure has proven to be highly effective at targeting excess fat cells without the need for surgery or recovery time.

The breakthrough treatment essentially freezes fat cells by exposing them to extremely low temperatures.  This crystallises and destroys the fat before the body naturally removes it in a similar fashion to food.

step by step coolsculpting

Contrary to Vaser Liposuction, patients may need a couple of treatments to achieve the desired results.  This can be carried out within a week of the initial CoolSculpting consultation.

Am I a good candidate for cosmetic surgery to eliminate my back fat?

Jennifer was the ideal candidate for Vaser Liposuction as she was healthy, fit and had tried to eliminate her back fat naturally through diet and exercise.  Vaser Liposuction is more suitable for those patients who are looking to target stubborn areas of fat, rather than an extreme weight loss solution as there are limits of how much fat can be removed during the procedure.

CoolSculpting is suitable for those not wanting to undergo surgery, however, like Vaser Liposuction it is not a weight loss solution.  On average this procedure can see a 20 percent fat reduction in the targeted area per treatment.  It is also a great procedure for those who are unable to allow the required recovery time post-surgery. In fact, often patients return to work shortly after the procedure.

Removing the back fat hasn’t just improved Jennifer’s physical appearance.  It has improved her confidence and self-esteem.  Prior to the surgery the back fat “…was the only thing I saw when I looked in the mirror”, she says. Now Jennifer has the figure she has worked hard to achieve and is happy to show it off.

Source: cosmosclinic.com 

Tuesday, May 21, 2019

How to Remove the Cholesterol Deposits Around Your Eyes

Xanthelasma is the medical term for cholesterol deposits around the eyes. As the name suggests, the condition is related to cholesterol and usually indicates high cholesterol levels in the blood. Of course, it can also mean nothing, but it’s best to visit your doctor who can identify the problem. The deposits appear on the corner of the eyes and have various size, shape or color.

In general, the deposits are treated surgically if possible. However, surgeries are dangerous as they’re close to the eye and can leave a nasty scar behind. Luckily, there are many natural remedies which are safer and incredibly effective against the problem.

The main causes of xanthelasma

The deposits are more common in older people with high cholesterol levels. They can also be caused by metabolic disorders, some types of cancer, diabetes and cirrhosis. All these health problems can raise the amount of cholesterol in the blood and cause the deposits to appear in the corners of your eyes.

Here are the top natural remedies against cholesterol deposits around the eyes:

Almonds

Yes, something as simple as almonds can actually prevent the deposits from forming. Almonds can regulate your cholesterol levels and prevent a variety of cardiovascular problems. You can also mix some almond powder with a bit of milk and apply the paste around your eyes for faster results. Ads by Revcontent

Recommended

Orange juice

Fresh orange juice has been known to reduce high cholesterol levels, so make sure to drink a glass or two every day.

Coriander

Make coriander seed tea and drink a few cups per day to reduce your cholesterol and prevent the deposits from forming.

Banana peels

Open up a banana and cut the peel in small pieces, then stick one on the deposits and secure with a bandage. Leave it to work for a couple of hours or overnight and rinse with water in the end. Regular usage of the peels can make the deposits disappear soon.

Nions

Squeeze an onion and mix the juice with some salt, then apply a bit of the mixture on the deposits and leave it to work for 2-3 hours or overnight. Rinse with plenty of water in the morning, and make sure not to let the mixture get into your eyes.

Castor oil

The oil contains a compound which can easily melt the deposits. Just rub a bit on the corner of your eyes and they should disappear soon.

ACV

Apple cider vinegar is a great natural remedy for a variety of conditions including cholesterol deposits around the eyes. Consuming it will regulate your cholesterol levels and stop the deposits from forming. You can also soak a cotton pad in the liquid and use it on the affected area.

Fenugreek seeds

Soak a handful of fenugreek seeds in water overnight, then drink the liquid in the morning before breakfast. Repeat the process every day and the deposits should be gone soon.

Source: healthline.com

How to kill a sinus infection in 20 seconds

Few things are worse than a sinus infection. Most people have experienced symptoms of sinusitis like a runny nose and facial pain. Symptoms can last for 10 days or 8 weeks. In the worst cases, they can last even longer. According to WebMD, more than 37 million Americans suffer from sinusitis.

So what would you say if we told you that a 20-second remedy could treat symptoms of sinusitis? All you need to do is apply pressure between the eyebrows, and drink a power solution made from apple cider vinegar, honey, cayenne pepper, and lemon. Follow these directions and be on your way to bliss.

The face contains pressure points can relieve pressure when pressed. Sinus Pressure Points recommends pressing the point between the eyebrows just above the bridge of the nose.

This works because pressing here helps mucus flow and prevents the sinuses from becoming dry and inflamed.

Source: home.remedydaily.com

Drink This And You’ll Lose 8 Pounds Of Belly Fat In Just 3 Days

Having a flat and healthy-looking belly often requires spending long hours at the gym. However, there another important contributor to great abs, and it’s what you eat. In fact, your diet accounts for 90 percent of how your abs look like. That’s why you need to pay close attention to the food you eat if you want great-looking belly.

The recipe we provide her is amazingly beneficial for giving the perfect shape to your abdominal muscles. In fact, if you consume it daily, you can entire reshape your belly.

Aside from being highly effective, this homemade fat-burning drink is quite easy to prepare. Actually it’ll only take a few minutes of your time. It’s also the best way to start a healthy and well-balanced diet.

How to use:
  • Take a bunch of fresh parsley and blend it in a food processor.
  • Squeeze the juice of one lemon and add it to the parsley.
  • Add half a cup of water in the mixture and blend for a few more seconds.

This mixture works extremely fast and you’ll be able to see the first results in only 2-3 days. The key to its effectiveness is parsley, which is packed with vitamins crucial for proper digestion. Lemons on the other hand are highly beneficial for fat burning. Aside for reshaping your belly, this mixture will also improve your metabolism.

For optimal results, you should take this drink on an empty stomach for 5 days every morning. Then, you make a 10-day break and repeat the process.

Other drinks you can consider

Below we provide a list of beneficial refreshing beverages you can also include into your diet to further stimulate the weight loss process.

Flavored Water: Slice different fruits and vegetables. Put them in a mug then fill the mug with cold water. This will not only enhance the plain-tasting water, but also enrich it with numerous vitamins your body needs.

Green tea: Drinking freshly-brewed cold green tea will significantly improve your digestion and reduce belly fat. You can add honey to sweeten it up.

Watermelon smoothie: Watermelon is one of the best smoothie ingredients because it packs a lot of water. Combine this refreshing fruit with ice and yoghurt to make the perfect smoothie.

Last, but not least, remember that hard work and patience are crucial for success. Stick to a healthy diet and the parsley-lemon juice and you’ll get a flat belly in no time.

Source: healthydiet24.com

Do You Have These Red Spots On Various Parts Of Your Body? Should You Worry? What Should You Do?

Are you one of those people who ignore a skin problem until it festers into something much larger? If you’ve been recently noticing a couple of red patches on skin, don’t panic! We have some home remedies that are sure to put your worries at ease.

You’ve noticed a couple of red spots on skin and before you know it, you’re on the internet typing in your symptoms. Most medical sites have made you believe that all your symptoms point to the worst disease possible. Wait for a second, take a breath. We have a couple of efficient home remedies for red spots on skin and we’re sharing them with you.

But first, we should tell you what causes red spots on skin, so you’re well equipped and informed to tackle it in a slightly calmer manner. The possible causes of red spots on skin could be:

8 Causes Of Red Spots On Skin:
  • An allergic reaction to something
  • Red spots left by acne
  • If you’ve developed a vascular birthmark
  • Spots on your skin due to angiomas
  • Over production of protein
  • A heat rash
  • A leaked capillary
  • Insect bites
These are the most common reasons, but if none of these seem like the reason for your red spots, we urge you to visit a medical practitioner ASAP. If you’ve found the cause of what causes red spots on face, then let’s move on and talk about some home remedies that’ll help you get rid of these scary red spots.

7 Best Home Remedies To Get Rid Of Red Patches On Skin:

1. Aloe Vera Treatment:
  • You’ll need a couple of fresh aloe vera leaves
  • Cut the leaves in half and scrape the gel off with a butter knife
  • Apply this gel to the affected area and keep for 15-20 minutes
  • Keep the rest of the gel in a fresh container and repeat this twice in a day
2. Coconut Oil Treatment:
  • All you need is a tbsp. of coconut oil
  • First you need to wash your face with a gentle face wash like Olay Regenerist Revitalising Cream Cleanser
  • Massage the affected area with coconut oil for a few minutes
  • Do all this before you go to bed and keep the oil on overnight
  • You’ll notice the red spots fading slowly
  • Repeat next day until the spots vanish leaving you with flawless skin
3. Dandelion Root Treatment:
  • You need 1 tsp. of dandelion root powder and 1 glass of water
  • Boil the powder in the water for a few minutes
  • Strain the water and sip on the liquid
  • It removes toxins from your body so continue drinking this for a day or two
4. Lemon Juice Treatment:
  • Take 2-3 tbsp. of fresh lemon juice
  • Soak a cotton ball with the liquid
  • Apply to the red spots and leave for 10 minutes
  • Wash it off and repeat thrice a day to notice your spots fading away
  • If you feel lemon is too harsh for your skin, you can always end the routine by applying a good moisturizing lotion like Olay Total Effects 7 in One Anti-Ageing Day Cream post washing and drying of your face.
5. Tomato Treatment:
  • Take a ripe tomato and slice it into half
  • Now start rubbing the tomato, gently squeezing its pulpy goodness onto your skin
  • Leave the pulp on your skin for half an hour and then wash it off
  • Your skin will feel naturally smooth and the spots will vanish
6. Banana Peel Treatment:
  • All you need is a banana peel for this home remedy
  • Start rubbing the inner soft part of the banana peel on the affected area
  • Continue this for 15 minutes and then let it dry for another 10
  • Wash it off with cool water
7. Apple Cider Vinegar Treatment:
  • Take half a tsp. of apple cider vinegar and dilute it in 2 tbsp. of water
  • Now gently dip a cotton ball in the solution and apply on your skin
  • Let it dry naturally after which you should rinse the area with cool water
  • Repeat it twice a day and notice the inflammation reduce drastically in a few hours.
Source: stylevast.com

4 Benefits of Rice Water for Shiny Hair and How to Use It

Hair care is a very important thing, because hair is one of the members of the body that is very representative of our appearance. You can do hair care at the salon, but you can also use natural ingredients for self-care at home. One of the things that made people curious lately is the benefits of rice water for hair.

Rice water has basically become one of the popular natural ingredients for treating the body, but it seems that not many people have acknowledged the benefits of rice water for hair.

The Secret of Rice Water for Hair

The benefits of rice water for hair have been popular recently, but it turns out that this method has been around since ancient times. As quoted from Ejinsight, in China, precisely in Huangluo village, there is a Yao tribe whose women have very long hair. The average hair of women in Yao reaches 1.5 meters.

The women of the Yao tribe not only have long hair but also have a deep black color. Of course it is not easy to maintain the health of hair that has grown throughout it. It turns out that shampooing with rice water is a hereditary secret behind long, shiny black hair.

Benefits of Rice Water for Hair

The content of various vitamins and minerals in rice water has many benefits for hair. Here are 5 benefits of rice water for hair that you need to know.

1. Fertilize hair

The benefits of rice washing water for the first hair is able to nourish hair. In rice washing water there is Inositol or vitamin B8 which can maximize hair growth. Generally, hair will be more difficult to grow longer if it is in a long state But with rice washing water you can make your hair growth run optimally.

2. Protect hair from damage

The second benefit of rice water for hair is that it can strengthen hair and prevent hair from damage. The content of Inositol in rice washing water helps to make a protective layer of hair. This layer even survives after the hair is rinsed with clean water. The result is that the hair becomes stronger and avoids damage such as dry, broken, and branched hair.

The content of amino acids and other vitamins in the hair also functions to relax the head so that blood awareness becomes more smooth. Circulation of the blood that gets smoother on the head will affect the hair and can strengthen the hair roots.

3. Make hair shiny and soft

The next benefit of hair washing water is being able to make shiny hair and hair. As mentioned earlier that Yao tribal women not only have long hair but also shiny black hair. This proves that rice water is indeed able to nourish the hair so that the hair becomes healthy.

Healthy hair has healthy cuticles. While a healthy hair wart will make your hair feel soft and will also more easily reflect light so that the hair looks more shiny.

4. Eliminate dandruff

The fifth benefit of rice washing water is that it can overcome the problem of dandruff in the hair. Dandruff is very disturbing appearance and makes it uncomfortable because it causes intense itching in the hair. Rice water can balance the pH of the scalp and also control oil production in the scalp so that you can be free from the problem of dandruff.

How to Get the Benefits of Rice Water for Hair

You can get the benefits of rice water for hair by routine maintenance. How to get the benefits of rice water for hair is very practical and economical because all you need is water and rice. Here's how to get the benefits of rice washing water for hair!
  • Clean rice from various impurities that are not needed.
  • Mix rice and water in a face with a mixture of 1: 1.
  • Soak the rice until the water changes color.
  • Put the rice water into a plastic container, then cover it. Leave the rice water 12-24 hours at room temperature so that the rice water ferments. But you forget about the water and let it sit for more than 24 hours, so it is better for the new rice water because the water condition is not good.
  • Use the rice water to rinse your hair. If water is still left, store it in the refrigerator for later use.

That's how to get the benefits of rice washing water for your hair. Good luck!

Source: medicalnewstoday.com

Saturday, May 11, 2019

This Effective Apple-Egg Diet Plan Can Help You Lose 10 Pounds In A Week!

As we all know, the key to losing weight is eating a healthy diet and getting regular cardio and strength exercise as well. However, there are other factors included in the process as well – genetics, bad habits, and your hormones play a part in weight gain as well. Despite the obvious aesthetical problem, weight gain has also been related to a variety of serious ailments, which is why you should take the effort to lose weight.

Furthermore, apples also contain a lot of water, another important ingredient for losing weight. They also contain vitamins, minerals, and acids which will support your body during the challenging effort and help you reach your goals faster. The best thing of all is that they’re low on calories, which makes them perfect for losing weight. Consuming apples regularly will improve your digestion and metabolism and keep your gut flora in balance, which is another important aspect of losing weight.

The diet we have for you today is based on apples and eggs as well. Eggs are just as great as apples – they are a great source of essential nutrients and protein as well, and although they’re rich in cholesterol, they are not harmful to your cardiovascular system.

Here’s how the diet plan looks like:

Monday, Tuesday, Wednesday
  • Breakfast: 1 egg (boiled), 2 fresh apples
  • Lunch: same as breakfast
  • Dinner: 1 egg (boiled)

Thursday, Friday, Saturday, Sunday
  • Breakfast: 1 egg (boiled), 2 fresh apples
  • Lunch: the same as breakfast plus a handful of almonds (unsalted)
  • Dinner: 1 egg (boiled)

In order to achieve the best results, you also need to drink plenty of water. If you don’t like plain water that much, you can switch to mineral water and herbal teas with no sugar. Whenever you’re feeling hungry, eat another apple, but make sure to stick to the diet plan. Follow the course for a week and you’ll notice the results. If you want to repeat the process, wait for a week and start all over again.
Source: stylecraze.com

I Started Consuming Cucumber 3 Times Per Day As The Doctor Said, After 5 Days Something Changed

Today we present you the amazing benefits of cucumber. We made a list of the most efficient ways that the consummation of cucumber will give to your body, so pay attention. If you haven’t start consuming cucumbers on a daily basis yet, you should definitely read this article and hopefully you’ll include them into your diet:

1. Hydration

You can supplement your hydration with 8 glasses of water in a day infused with cucumbers.

2. Fights Diabetes

Cucumbers stimulate the pancreas to produce insulin. This is great for those who are fighting with diabetes. Every one who suffer from diabetes should include this veggie in their diet.

3. Promotes Kidney Health

This veggie reduces the levels of uric acid and that is helpful for decreasing the work for the kidneys, you are basically giving them a small rest!

4. Revives Muscle And Joint Pain

The cucumber has a large amount of vitamins and minerals which this helps with reducing the muscle and joint pain.

5. Softens Your Hair And Protects Your Nails

The amount of silica in the cucumber gives you a strong nails and shiny, soft hair.

6. Improves Digestion and Metabolism

This veggie is excellent for processing the food quicker in your intestines, and also helps to speed up your metabolism.

7. Stabilizes the Pressure and Fights Against Cancer

For those who are having difficulties with high pressure, cucumbers help with lowering the pressure and stabilizing it. It also reduces the chances of developing cancer.

8. Refreshes Your Mouth and Promotes Weight Loss

The large amount of liquid refreshes your gums and mouth, and also promotes weight loss, how nice is that?!

9. Rich of Minerals And Vitamins

Cucumbers are rich in sillicum, potassium, magnesium and vitamins such as A, B and C.

10. Reduces Cholesterol and Eliminates Toxins

Since cucumbers is consist most of water, they can help you organism with “washing” itself off, while removing all the toxins. The presence of the compound known as sterol will help you to reduce cholesterol in your body, too.

Source: wellnessofthebody.com

10 Signs You Are Gaining Weight Because Of Too Much Estrogen

Our body usually gives us signals about some changes inside. It is very important to listen to it. Have you gained extra pounds? Do you have any health problems? If your answer is “yes”, you must consult with your doctor!

Today we want to discuss the topic of estrogen. The female hormone estrogen is produced by the ovaries and carries many functions from the regulation of the menstrual cycle to the distribution of fat deposits. The estrogen can cause excessive fatness and other health problems.

We want to help you understand the causes of your illness. Moreover, whether they are caused by estrogen or not.

We have prepared a list of 10 signs that will help you to understand the reasons of your disease.

1. Swollen breasts

This is the one of the common symptoms of estrogen.

If you feel that your breasts are swollen you have to consult with doctor.

2. Tender breasts

If you have very sensitive and tender breasts, it means that they are growing or you have fibrocystic tissue.

3. Thyroid dysfunction

The estrogen dominance can cause a thyroid dysfunction which can affect many other areas of the body.

4. Mood swings

Mood swings are also the cause of estrogen.

This is a feeling that looks like PMS, you feel irritable and depressed.

5. Swollen hands

If you feel that your fingers are swollen you should consult with a doctor.

It’s all because of estrogen!

6. Swollen feet

Your feet as well as hands can swell too.

Consult a doctor!

7. Belly Fat

An excess weight around the belly is a sign of estrogen dominance.

8. Memory loss

Memory loss and foggy thinking indicate a large amount of estrogen in your body.

9. Endometriosis

Endometriosis may be a sign that too much estrogen is the culprit.

10. Cramps
  • During your menstrual periods you can face with the problem of cramps.
  • Reading our article you could notice the symptoms that are close to you.
  • We recommend you to change lifestyle.
  • You should eat only healthy and proper foods, avoid exposure to xenoestrogens and stop being nervous.
  • Moreover, you have to consult with the doctor! Your doctor will give you the proper diagnosis and treatment.
  • Health is better than wealth. Take care of yourself!

Source: medicalnewstoday.com

Get Rid of Nail Fungus Forever – 2 Ingredient Recipe

A fungal nail occurs when a fungus attacks a toenail, a fingernail or the skin under the nail. Any part of the body can be affected by the fungal infections.

According to the American Academy of Dermatology (AAD), toenails are more often affected by the fungal infections than the fingernails, because they are usually confined to the shoes and are in moist, warm environment.

If you are healthy, the fungal infection will not cause any serious problems. But, it can be hurtful, look awful or damage the nails.

Get Rid of Nail Fungus Forever

You can get rid of nail fungus with this natural remedy. It contains only 2 ingredients: apple cider vinegar and baking soda.

Baking soda will not kill the fungus, but it will surely prevent it from spreading and growing.

The apple cider vinegar makes it difficult for the fungus to survive because it is naturally acidic. Do not worry, it will not damage the surrounding skin and nail.

You need:
  • 4-5 tablespoons baking soda
  • 1 cup white vinegar or apple cider vinegar
  • Water
  • Paper towels

Directions:

Make a mixture of 1 cup vinegar and enough water to soak your feet in. Soak for 15 minutes. Then, dry with paper towels.

Add more baking soda to the water and soak your feet for another 15 minutes. Then, again dry your feet with paper towels.

Do this twice a day. The fungi will be destroyed by the vinegar, and baking soda will inhibit the growth of more.

Source: pinshealthportal.com

Friday, May 10, 2019

6 Anti-Aging Exercises That Can Make Your Body Feel Like New

If you are after the perfect physical, mental, and spiritual harmony, you might be able to find it in Qigong, the Chinese technique that combines very particular physical and meditative exercises. Famous Taoist Master Mantak Chia believes that practicing these exercises on a regular basis may not only improve your physical and mental health but may even prolong an active lifestyle.

1. Breathing

The Masters believe that breathing with a particular technique can improve your general wellbeing and prolong your life.
  • Inhale slowly through your nose and hold for 1-2 seconds;
  • Add another small inhale to fill the lungs to the fullest capacity;
  • Hold for 1-2 seconds and exhale through your mouth. Exhale long and slow.
  • This breathing technique balances the entire body and slows down the aging process significantly.

2. Warming up

Warming up is very important. This is a preparation step and you should never skip it.
  • Relax your body completely;
  • Slightly bend your knees and try to distribute the weight evenly onto both of your legs;
  • Start swinging your arms forward and backward and then from side to side.

3. Strengthening the kidneys and back

This exercise strengthens your back and also stimulates the kidney function.
  • Stand straight with your feet together or just shoulder-width apart and point your toes forward.
  • Slowly bend forward and down, without bending your knees;
  • Look up and try to reach the floor. If you do it right, you should feel your waist muscles stretching;
  • Stay in this position for 10 seconds, then slowly go back to the initial position;
  • Repeat 6 times.

4. Straightening the back

This exercise corrects your posture and improves your vision, strengthens and straightens the back, and improves the circulation of oxygen in the blood.
  • Stand straight and slowly move your head back;
  • Stay in this position for 15 seconds and take deep breaths;
  • Slowly return your head to the initial position;
  • Repeat 6 times and do this exercise a few times a day.

5. Stress relief exercise

This exercise relaxes the whole body.
  • Stand with your feet double shoulder-width apart;
  • Raise your hands to your chest with your palms facing the chest;
  • Fully extend one arm;
  • Bring your hands back to your chest;
  • Return to the initial position;
  • Repeat on each side 6 times.

6. Stretching the back

This exercise is called “2 hands pushing the sky” and it increases the lungs’ capacity, provides the body with energy, and improves the function of the liver, the kidneys, the stomach, and the intestines.
  • Stand straight and lock your hands in front of you;
  • Inhale and slowly raise your hands over your head with your palms facing up;
  • At the same time, rise onto your toes. Exhale and slowly lower your hands to the initial position;
  • Repeat 6 times.

Source: brightside.me